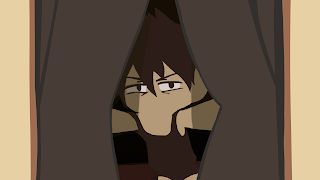
 However, on the other had, this method also had it own challenges I had to work through. First thing being, since there are no outlines, I had to have a really good grip on my character model, how each part would look at a particular angle as I had outline to guide me. On top of that, I had to relied on really bold shapes and colour choices to differentiate the different parts of the character, as again, I had no outline to depend on to separate them. This was a particular challenge especially in the first couple of scenes, where there are a lot of overlapping parts in the shot that would "merge" together into large colour chunks and can get confusing if not suggested clearly (example being the image on the right).
 Another particular, challenge came in the form of software limitation as well, as the onion skin setting of TV when switch to the two colour mode for the frame before and after, it would automatically fill out the entire character as 1 colour, which erase all the different colour blocks that defined the different section of the character, rendering the onion skin useless. Therefore I had to switch to basic onion skinning which just turn the opacity of the layers down, but of course, it is not as clear as the two colour mode in the differentiation between the before and after layers.
However, I pulled through all of that, basically free-eyeing most of my animation, which turned out not half bad at all and looks exactly like I wanted it to. And as you can see from the frames below, the shots look very polished right away.
The other notable thing was doing the window shot, where I created a multiply effect to use for the shadows of the curtain by using darker colours set on a layer above the animation and just turn the opacity. down. In fact, layering structure and knowledge that I gained from illustration really helped out with making the animation for this as efficient as possible.
And the final thing, the last scene of the animation was incredibly fun to do, not just because of the "bouncy" and silly animation I used for the icons, but also because I had the chance to play around with the crop copy tool of TV Paint where I replace your brush tip with the image selected, which makes it perfect for doing the glitch effect of the last shot.


No comments:
Post a Comment